The bane of every nail expert’s existence: the good old gel nail polish remover. Usually, the first “solution” that springs to mind is the temptation to pluck, rip, or bite off your gel polish at home. But please, please don’t do it for the love of beautiful nail art.
Many times, people lament that their gels have damaged their nails, but in actuality, the peeling that is discouraged is the true problem. Layers of the nail plate are peeled off each time you choose to remove your gel nail polish. Your nails will eventually get weaker, thinner, and more brittle, even though this may seem innocuous at first.
It may take months for your nails to heal after this damage. If that weren’t enough of a reason, it also affects how well your next gel manicure turns out.
Eliminating Gel Nail Paint
Even while your manicure and pedicure might look great, you might want to remove the gel polish at some point to switch up the color or finish. Every brand has a somewhat different method for removing gel nail paint. Examine the manufacturer’s instructions for your gel kit.
The following tools are required for at-home gel nail polish removal:
- Foil, plastic wrap, or nail clips intended for gel polish removal
- Acetone (make sure it is 100%)
- Petroleum jelly
- Nail file
- Towel
- Cotton balls
- Washcloth
Six Simple Steps to Remove Gel Nails at Home
Before you begin, know that the following procedure is the conventional acetone approach. However, a gel nail polish remover is quicker. Compared to the 15 minutes required by the acetone procedure, it removes gel polish in 5 minutes.
You now know your options for DIY gel manicure removal. This simple, step-by-step tutorial will show you how to remove gel nails at home.
Step 1: Guard your surfaces
Okay, experts caution you to protect your surfaces before beginning any actual removal. Gel remover will strip varnish or coatings off surfaces, so be wary of this. Consider using an old mat covered in paper towels and covered in a towel. In this manner, you may be certain that your cherished coffee or dining table won’t be permanently damaged even if you spill and cause a mess.
Step 2: Buff
This initial phase is essential for effective elimination. Take out your nail file and start filing off the gel top coat, carefully removing all the shine. This breaches the gel seal so the acetone can begin dissolving the dried paint. If you skip this stage, removal will be a nightmare, if not impossible. Some gel polish top coats are so hard-wearing that if you don’t buff or file it beforehand, it won’t budge.
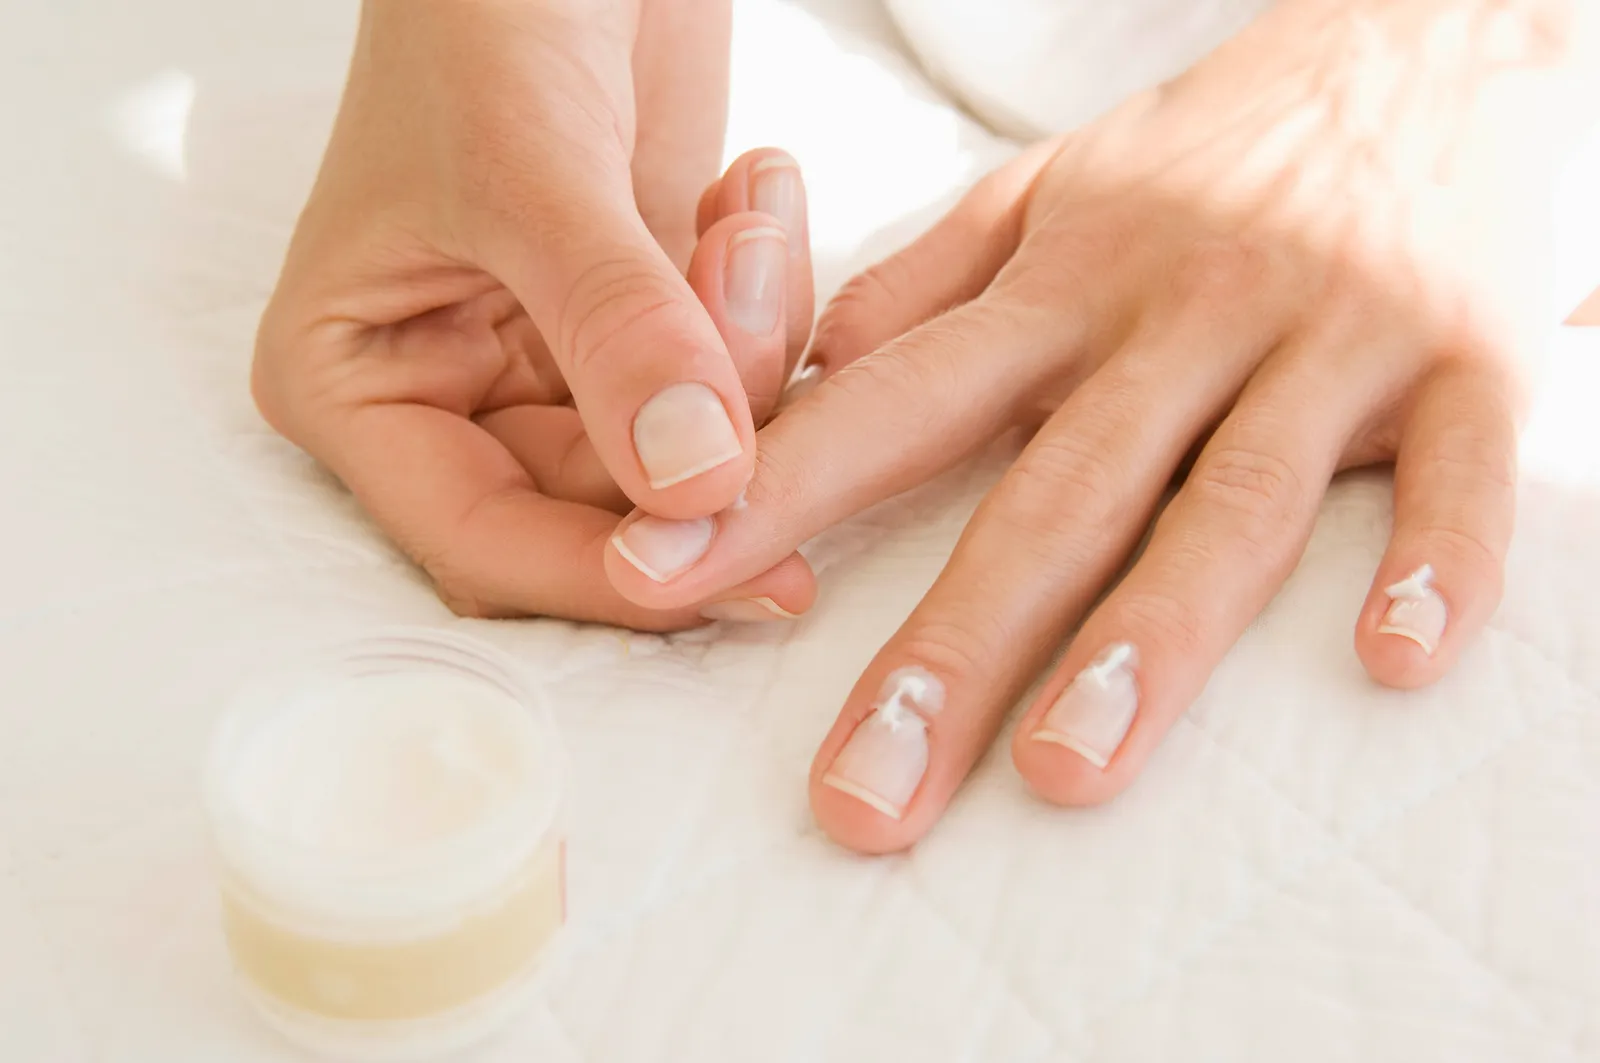
Step 3: Guard your cuticles and skin
While it’s still not necessary for removal, this greatly aids in any drying caused by the acetone. Apply cuticle oil to the skin surrounding the nail to help with dehydration. It doesn’t stop or inhibit the removal; it just helps to make the removal less drying, as pure acetone can be harsh. Observing the “gels ruin my nails” group, do you guys not understand this step?
Step 4: Soak them off
The real soaking-off phase comes next. “Saturate a square of cotton (either a round cut to size or ball) in acetone, place it on the nail, and then wrap the foil around as tightly as possible,” Humphrey clarifies. “Leave this for around 10 minutes.”
It’s crucial to completely submerge the cotton round since, occasionally, it could dry out. Try practicing this on five fingers at a time to make your life easier, as it can be difficult to accomplish on all ten at once.
Step 5: Observe the gel peeling off.
It should appear as though your gel is flaking off after you’ve removed the foil. Gently push off any gel that’s come loose using your orange wood stick or cuticle pusher. There shouldn’t be much pressure required. Re-wrap if necessary and repeat if parts of the gel have not come off — never force any product off the nail plate, as this will cause damage.
Step 6: Rehydrate
“Once you’ve removed all the gel, gently buff your nails with a soft buffer (220 grit ideally) and apply plenty of cuticle oil,” Humphrey suggests. “I recommend the apricot nail and cuticle oil, and hand cream to rehydrate.”
Humphrey estimates that “this process will probably take approximately 30-45 minutes to do yourself one hand at a time.” To avoid being tempted to remove the gel from your nail plate too soon, turn on your favorite Netflix show before beginning.
Advice and Safety Measures
- You should never remove the gel polish from your nails as this can weaken and chip them.
- Regular acetone might not be strong enough to remove gel polish, so always use acetone, especially for this purpose.
- Avoid using excessive pressure when buffing or removing gel polish, as this might thin and weaken your nails.
- When removing gel polish, take breaks to prevent overexposure to acetone.
- Before applying gel polish, apply a base coat to provide a layer of protection that will make polish removal easier.
In the end!
If you use the appropriate techniques and instruments, it’s unnecessary to be afraid or spend a lot of time removing gel nail paint. You can ensure that you remove gel nail paint safely, quickly, and without damaging your nails by adhering to our comprehensive guide.
Stay in touch to get more updates & news on Mystories List!